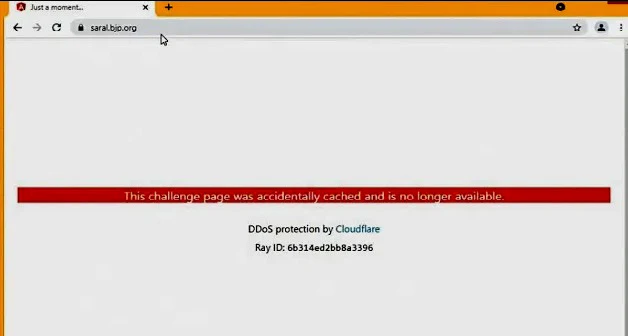
Are you facing the "This Challenge Page was Accidentally Cached" error while browsing the web? If yes, then you're not alone. Many users encounter this error while browsing the internet, and it can be frustrating to deal with. Fortunately, this issue is fixable, and in this guide, we'll show you how to fix it step-by-step.
Clear Your Browser Cache
The first step to fixing the "This Challenge Page was Accidentally Cached" issue is to clear your browser cache. This is because the page you're trying to access has been cached, and your browser is trying to retrieve the page from the cache instead of the server. Here's how to clear your browser cache:
Open your browser and click on the three-dot menu icon in the top right corner.
Select "More Tools" and then "Clear browsing data."
Choose the time range for which you want to clear your cache. If you're not sure, select "All time."
Make sure "Cached images and files" is checked, and then click "Clear data."
Set the correct time and date
Setting the date and time in Windows is a simple process. Here are the steps to do so:
Click on the clock in the system tray
The clock is usually located in the bottom right corner of the screen. Click on it to open the date and time settings.
Click on "Date and time settings"
Click on the "Date and time settings" option located at the bottom of the pop-up window.
Set the date and time
In the Date and Time settings window, make sure that the "Set time automatically" option is turned on. If it's not, turn it on.
If you want to set the date and time manually, turn off the "Set time automatically" option. You can then click on the "Change" button under "Change date and time" to set the date and time manually.
Set the time zone
Make sure that the correct time zone is selected under the "Time zone" section. If not, click on the "Change" button to select the correct time zone.
Click "Sync now"
If you have turned on the "Set time automatically" option, click on the "Sync now" button to synchronize the date and time with the Windows time server.
Click "OK"
After you have set the date and time, click on the "OK" button to save the changes.
That's it! You have now successfully set the date and time in Windows.
Reset Google Chrome
Resetting Google Chrome can be useful if you are experiencing issues such as crashes, slow performance, or unwanted extensions. Resetting Chrome will restore its default settings, clear browsing data, and remove any extensions or themes you may have installed. Here are the steps to reset Google Chrome:
Open Chrome's Settings
Click on the three-dot menu icon in the top right corner of the Chrome window and select "Settings" from the dropdown menu.
Scroll down to the bottom of the Settings page
Click on the "Advanced" option located at the bottom of the Settings page to expand the options.
Click on the "Reset and clean up" option
Under the "Reset and clean up" section, click on the "Reset settings to their original defaults" option.
Confirm the reset
A dialog box will appear, explaining what will be reset when you perform this action. Click on the "Reset settings" button to confirm.
Restart Chrome
Chrome will now be reset to its default settings. Restart the browser and begin using it as usual.
Note: -
Keep in mind that resetting Chrome will remove your browsing history, cookies, and other saved data. If you want to keep this information, you should back it up before resetting the browser. Additionally, any extensions or themes you have installed will be removed, so you will need to reinstall them if you want to use them again.
Try a Different Browser
If neither of the above steps fixed the issue, then it's possible that the problem lies with your browser. Try accessing the web page on a different browser to see if the issue persists. If it doesn't, then you know the problem is with your original browser.
Encountering the "This Challenge Page was Accidentally Cached" error can be frustrating, but it's a common issue that can be fixed easily. By following the steps in this guide, you should be able to fix the issue quickly and get back to browsing the web without any interruptions.


